Of all of the watercolour techniques, glazing is often overlooked by beginner artists. What is watercolour glazing? In simple terms, glazing is a method of creating layers of transparent washes.
Glazing is a wet on dry technique, meaning that each layer is completely dry before adding more paint on top.
Why would you need to do this? Glazing allows for the intensity or value of a colour to be built up gradually. This is a great watercolour technique for conveying light and dark areas of a painting.

Glazing is also great for mixing colours on your watercolour paper instead of mixing in the palette.
For example, if you were to apply a thin wash of yellow and let it dry on your paper, then apply a thin wash of blue, your final result would be a shade of green.
Since watercolour paints aren’t like oils or acrylics in that they are more translucent, you can’t lighten an area with a lighter colour once the paint is applied. Glazing allows for lighter areas to stay light.
Watercolour glazing process
Before you begin the glazing process, check to see if your paints are more opaque or more transparent.
Most of the time, a paint brand will indicate the sheerness of a colour on the tube. Check out how to read labels on Winsor & Newton paints.
You’ll also want to be sure that you’ve chosen the correct watercolour paper for the project. Some papers don’t handle multiple layers well and others can lift the colour off when it gets wet again. Now is a great time to read my guide to watercolour paper.
Your first layer of paint will be a light wash of colour. Remember, watercolour is applied from light to dark as you can’t go back and place a lighter colour on top of a darker one.
You’ll want to let your layers dry completely in between applications. You can use a heat gun or hair dryer to speed up the process, or work on a different part of your painting as it dries.
To increase the intensity or darkness of a colour, apply another thin layer overlapping your previous layer and let it dry completely as well.
Continue this process until your desired value is achieved!
How to make a watercolour glazing chart
What is a glazing chart? A watercolour glazing chart is an example colour chart that allows you to see how your paints react when layered on top of one another.
Sometimes you can’t always be sure how a colour will appear when placed on top of another, so this is a great way to plan your glazing process and have a visual to refer to.

Different brands plus different pigment combinations play differently with one another, so a glazing chart is a handy way to see how one interacts with the other before you apply the paint to your final piece.
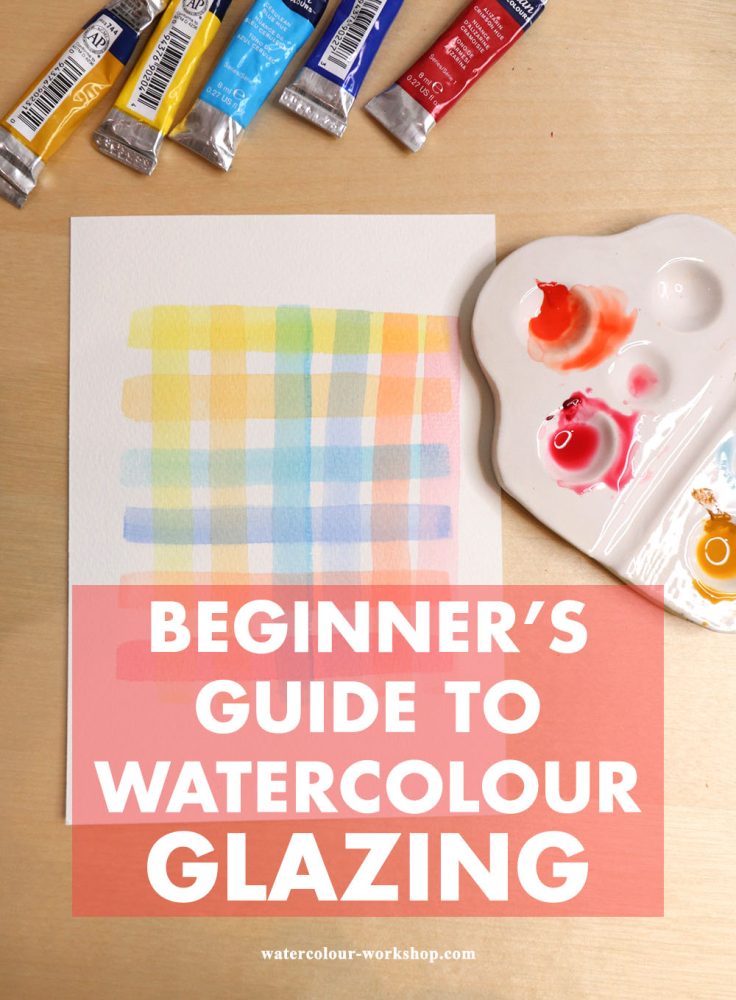
Typically, a glazing chart is made up of long brushstrokes of transparent painted lines. Each brushstroke overlaps a single colour, resulting in layered washes of mixed colours.
This sample chart will show you how different paint colours look and blend when on top of one another.
You’ll need a few things to create a glazing chart. I recommend a wide flat brush for your brush strokes because you’ll want to create each line in a single stroke. A piece of paper that matches the quality of your finished piece will also be needed.
Using two jars of water will really help this process as well. One to wash off your brush, and the other to use as your “clean water” for applying to the paint. There’s nothing worse than contaminating your paint with dirty paint water — especially when you’re trying to grasp how your colours react with one another.
As for your colours, you can use your primaries (yellows, reds and blues) or use the same colours that you’ll be using for your artwork. You can create a quick little glazing chart before a painting or keep a chart on hand to refer to for general purposes.
Prepare your paper
You can create a little grid using pencil and a ruler, or just go at it freehand. It’s totally up to you!
If you’re creating a ruled and lined pencil grid, you’ll just want to create enough squares for each of your paint colours, both horizontally and vertically.
Make sure that your squares are the same width as your flat paint brush because you’re going to be painting the brushstrokes in one single line.
Leave a gap between each square so that they don’t blend into one another during the glazing process.
How to paint your watercolour glazing chart grid
First, prepare your paints. Squeeze a little bit of paint out onto your palette from each tube. Mix the paints with water to dilute them and allow you to create a thin wash.
Each of your colours will be applied in a thin wash. Start with the lightest colours/hues first so you can build them up and really see the effects of glazing.
Paint each of your colours vertically on your chart or piece of paper. Be sure that the brush is clean when changing colours so that you don’t contaminate the next with the previous shade.
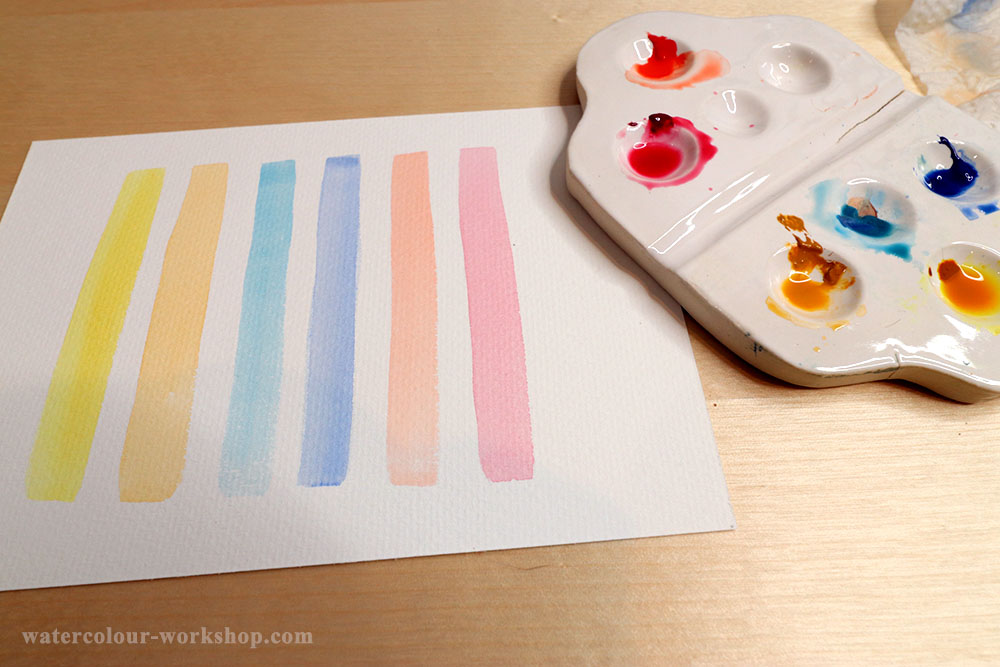
Let these colour stripes dry complete before going any further. You can speed up this process with a hair dryer or heat gun.
Once your initial lines have dried, paint lines horizontally across them, using each colour in the order you previously used.
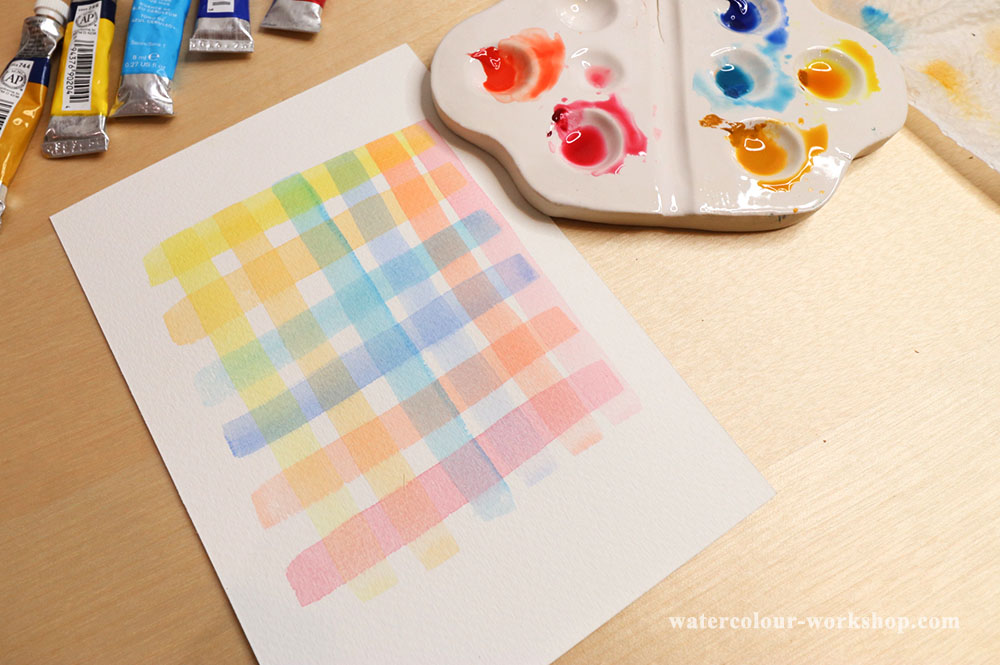
Remember to do this using one single brushstroke for each line. Use a light hand! You don’t want to disturb the first layer of paint or accidentally smudge/remove any paint with your second layer.
When you’re done, let this dry completely to see the pretty colours you have created!
Label each of the colours on your chart so you can refer back to it. It’s also a good idea to indicate whether the paint was a more transparent pigment or opaque.
Layering a single colour
In the images below, you can see what happens when we start with one solid layer of a single colour, and then add another layer of the same colour on top.
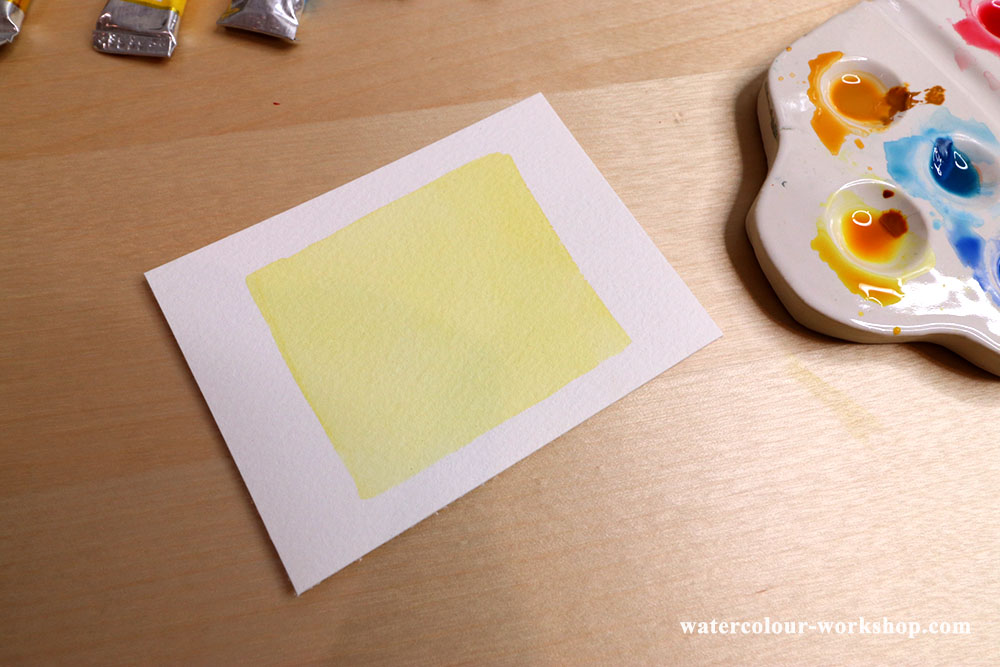
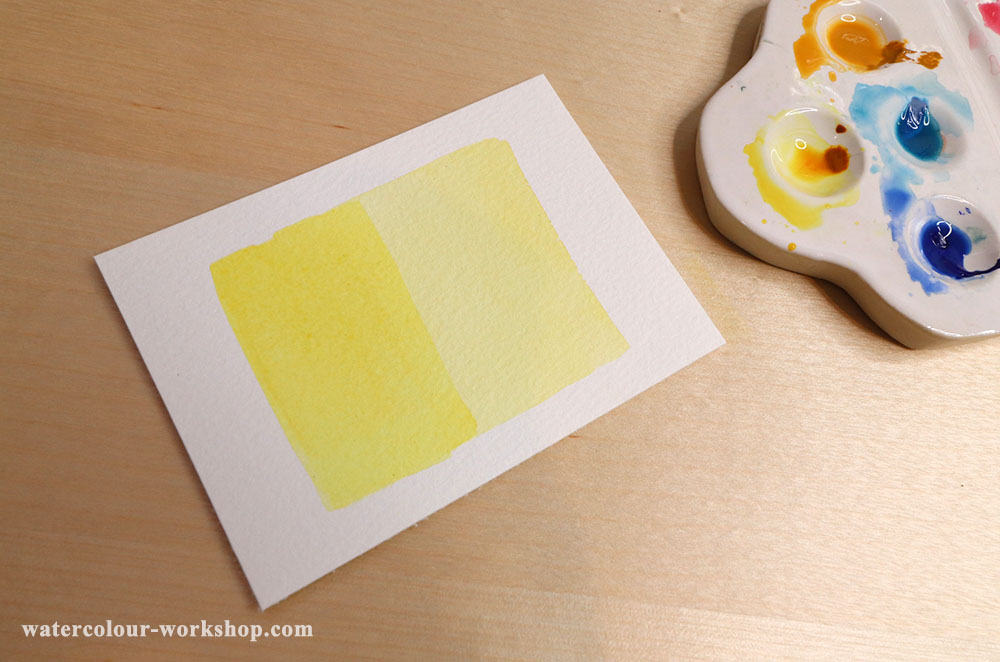
With these visuals, you can see how achieving light and dark values are possible through the process of glazing.
Watercolour layering or “glazing” is a process that can take some trial and error to master, but once you get the hang of how your colours react, you can really start to create some beautiful pieces!
Pin this:

Besides being a wife and mama, I’m an entrepreneur, artist and author of the Watercolor With Me book series. I’m from Ontario, Canada and founder of the brand Wonder Forest. I’m here to help you on your watercolour journey!
your class is easy to understand thaks you GF
Thank you Dana. I always learn from your tutorials.
I’ve been interested in trying watercolor for some time and yours is the first real tutorial I’ve found. It’s straightforward w great illustration. Great job!!! I learned so much in the last 10 minutes I’m just amazed…I don’t want to stop!!! Thank you so much for making this!!!! I recommend this highly to any beginner!!!