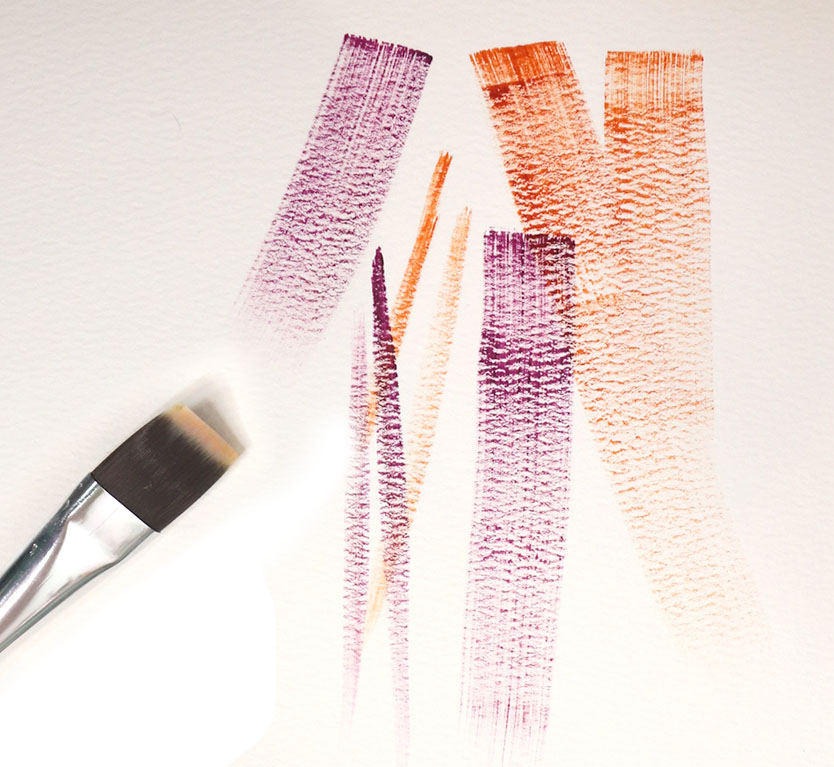
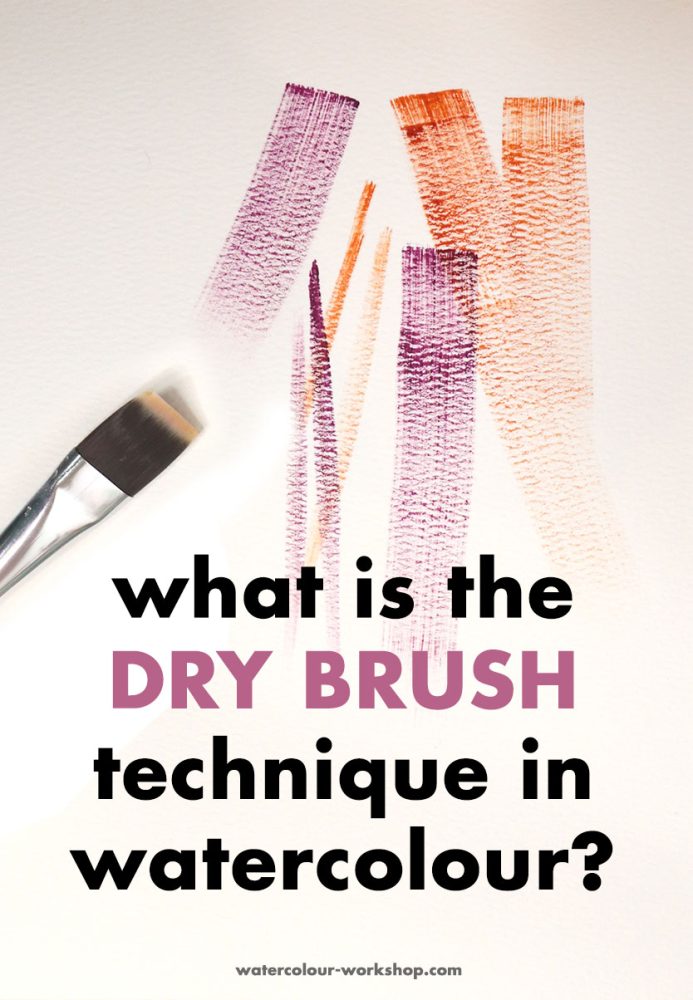
The dry brush technique in watercolour is one that can help bring texture and fine details into a painted piece.
Very simply, dry brushing is the process of laying down watercolour paint with a dry brush (no water!) and a bit of paint.
This technique is often overlooked… which is a shame because using a dry brush can really create interest in a painting.
Eliminating the water may seem a little counter-productive; being that watercolour is called watercolour for a reason! But removing the water element from the brush (similar to acrylic painting, gouache, and oil) can create super unique strokes to represent different areas of the painting.
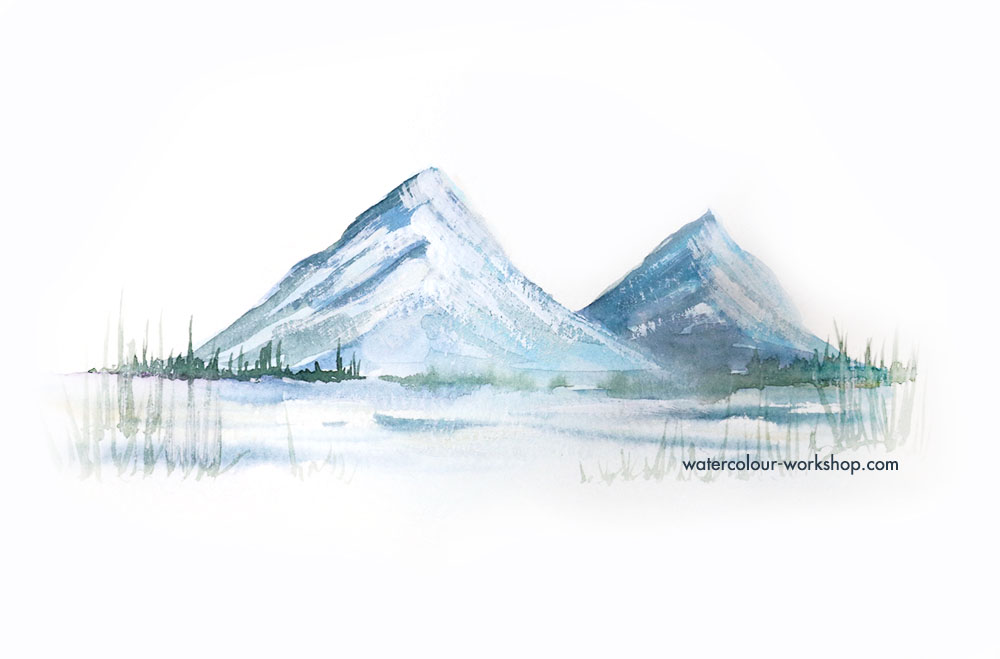
Take a look at this piece for example:
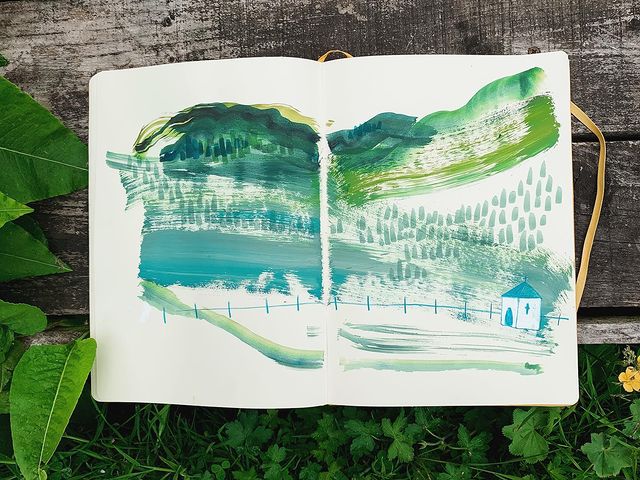
In this painting created by @gmadethis on Instagram, layers of dry brushstrokes were painted in different shades of greens and blues to create a landscape scene. You can clearly see the brushstrokes, broken edges, and varying light/dark areas of the paint.
Texture, highlights, peaks and valleys are magically created by a simple swipe of a brush!
The hard, broken edges that a dry brush creates can be used for textured waves in a watercolour ocean scene. The bristles of your brush can be fanned out to create the perfect happy little trees (à la Bob Ross). There are so many possibilities!
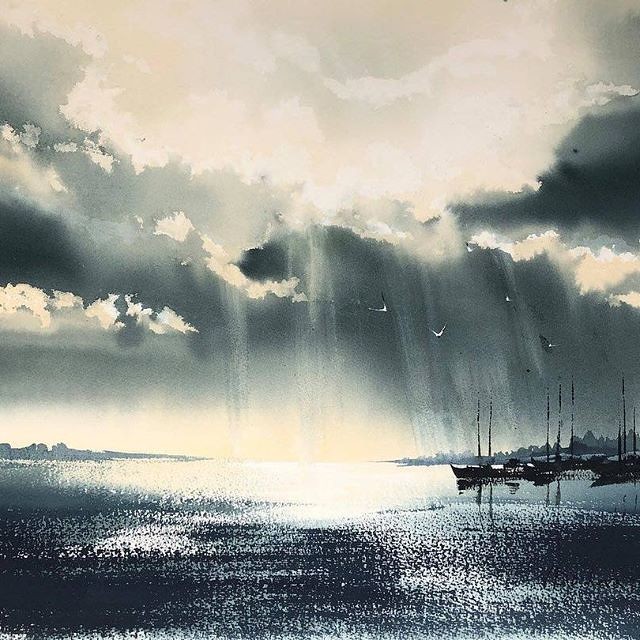
In the image above, a dry brush was used to create the glistening water highlights by swiping gently over the dried painting. It was also used to create the sun beams shining through the clouds.
What tools should you use?
When trying the dry brush technique in watercolour, you should try to stick with tube paints. Tube paints allow you to dispense the paint in a pan and control the thickness — without water.
When using pre-filled pan paints, you need water to activate the paint which doesn’t make for a very effective dry brush!
Although it’s not necessary, a rough textured watercolour paper will help add extra texture to a dry brush application and looks so lovely paired with this technique.
You can also try using gouache instead of watercolour paint for a more opaque look. Gouache is a mix between watercolour and acrylic paint and offers additional coverage that often watercolour paints can’t achieve.
The type of brush is totally up to your personal preference. I prefer flat wash brushes and pointed round brushes for different effects. You can also experiment with fan brushes which add really interesting strokes to a painting.
What is a dry brush technique good for?
Many people enjoy using a dry brush because they like the control they have while laying down their brushstrokes. Unlike wet applications, you don’t have to worry about your strokes bleeding or going astray.
This technique is perfect for landscapes where certain areas need textured details. Bark on trees, ocean scenes, texture in the sand, wispy and wind blown grasses, adding highlights or snow to mountaintops, and various other elements.
It is not specifically reserved for landscapes though! Anywhere that you require harder edges, more opacity, or broken brush strokes are good candidates for the dry brush technique.
How to create dry brush effects in watercolour
If you’re ready to give this method a try, here are some tips to help you get started.
If you’re using a smooth paper, you’ll need to create brushstrokes more quickly. The speed of your stroke impacts the effect of the dry brush! Try moving your hand at different speeds to practice getting the effect you desire. Your paper plays a big roll in how fast/slow you should move.
The amount of paint on your brush will also determine the outcome of your strokes. Use a loaded brush and move quickly to create gorgeous textured effects and bolder areas. Use smaller amounts of paint for grazing objects in your painting with a dash of interest.
The wetness of your paper is also something you’ll want to keep an eye on. The dry brush technique works best on dry paper, so if your paper still has a damp sheen to it, the technique will not work well.
With wet paper, the colour will flood into the damp areas, creating a soft wash which is the opposite of what we are going for.
You can wipe some of the paint off of your brush onto a paper towel before applying your strokes to create more of a “less is more” effect.
Simply skimming your brush over the paper with light pressure will help to apply the least amount of paint to the paper. This works really well for highlighted areas (imagine the high points of your painting and apply highlights there!)
With a little practice and experimenting with your tools, you will become more comfortable with using dry brush techniques in watercolour. Practice sheets are super helpful for beginners, so grab some scrap paper and try your hand at creating some texture in your paintings!
Pin this:
Besides being a wife and mama, I’m an entrepreneur, artist and author of the Watercolor With Me book series. I’m from Ontario, Canada and founder of the brand Wonder Forest. I’m here to help you on your watercolour journey!
Am enjoying the expert information about dry brush watercolour painting in the video, never having worked at that over time. I am not a trained art student at all. Just using a small talent by using art books and working at watercolours for my family and me.
Thanks, this is a really useful way of adding texture that I didn’t know about before! I like getting these short bursts of advice and learning in my email inbox, it helps learning the art of watercolour to feel less overwhelming 🙂
Thank you Dana,
This is really helpful, looks good and is appreciated.
but is the brush totally dry, or slightly damp ?
Dana, once again I learned something here I didn’t even realize that I NEEDED to know!! Thank u again so much for making these. I’m pinning ALL of them as I read so someone else can be exposed and learn behind me. Can’t wait to get to try this new stuff!!